
Introduction: A Cookie That’s More Than Just a Recipe
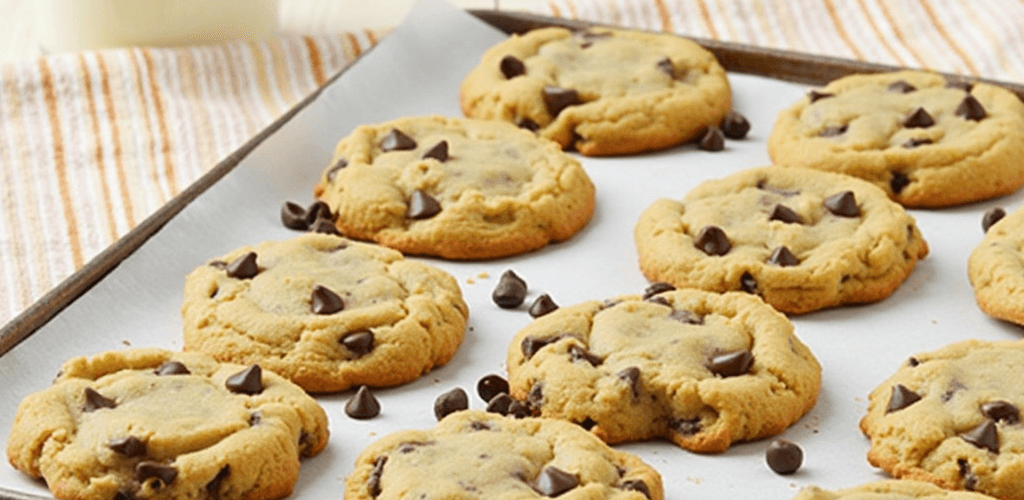
Picture this: the warm, buttery aroma of freshly baked cookies filling your kitchen, the chocolate chips melting perfectly into gooey goodness. Whether you’re baking for a family gathering, a quick midnight treat, or simply to indulge yourself, nothing compares to the classic Nestle Toll House Chocolate Chip Cookie recipe. It’s more than a dessert—it’s a nostalgic journey that takes you back to cherished memories of baking with loved ones.
This comprehensive guide will not only walk you through the legendary recipe step-by-step but also share tips, tricks, and creative variations that will elevate your baking game. Get ready to master this iconic treat and make it your own.
Why the Nestle Toll House Cookie Recipe Is Legendary
The Nestle Toll House Chocolate Chip Cookie recipe has been an all-time favorite since the 1930s when Ruth Wakefield first created it at the Toll House Inn. Her accidental discovery—adding broken chocolate pieces to cookie dough—gave the world a sweet gift that has never gone out of style.
What Makes It Special?
- Perfect Balance of Flavors: The richness of butter, sweetness of sugar, and indulgence of chocolate chips combine in harmony.
- Customizable Texture: Whether you prefer your cookies soft and chewy or crispy and crunchy, this recipe adapts beautifully.
- Universal Appeal: Loved by both kids and adults, these cookies have a timeless charm that resonates across generations.
Ingredients for Nestle Toll House Chocolate Chip Cookies
The Essentials
Let’s start with the magic mix of ingredients that makes this recipe shine. Make sure you have everything ready before you begin.
| Ingredient | Quantity |
|---|---|
| All-purpose flour | 2 1/4 cups |
| Baking soda | 1 teaspoon |
| Salt | 1 teaspoon |
| Unsalted butter (softened) | 1 cup (2 sticks) |
| Granulated sugar | 3/4 cup |
| Brown sugar (packed) | 3/4 cup |
| Vanilla extract | 1 teaspoon |
| Large eggs | 2 |
| Nestle Toll House semi-sweet chocolate chips | 2 cups (12 oz) |
| Chopped nuts (optional) | 1 cup |
Step-by-Step Instructions for Perfect Cookies
1. Preheat Your Oven and Prepare the Baking Sheets
- Set your oven to 375°F (190°C).
- Line your baking sheets with parchment paper or leave them ungreased for a more traditional approach.
2. Combine the Dry Ingredients
- In a medium bowl, whisk together the flour, baking soda, and salt.
- This ensures an even distribution and prevents lumps when added to the wet ingredients.
3. Cream the Butter and Sugars
- In a large mixing bowl, beat the softened butter, granulated sugar, brown sugar, and vanilla extract until light and fluffy.
- Add the eggs one at a time, mixing well after each addition.
4. Mix the Wet and Dry Ingredients
- Gradually add the dry ingredients to the wet mixture.
- Stir just until combined—overmixing can result in dense cookies.
5. Fold in Chocolate Chips and Nuts
- Gently fold in the chocolate chips and nuts (if using) to ensure they’re evenly distributed throughout the dough.
6. Scoop and Bake
- Use a tablespoon or cookie scoop to drop rounded dough balls onto the prepared baking sheets, leaving about 2 inches of space between each one.
- Bake for 9–11 minutes or until the edges are golden brown.
7. Cool and Enjoy
- Let the cookies cool on the baking sheet for 2 minutes before transferring them to a wire rack to cool completely.
Tips and Tricks for Perfect Cookies Every Time
- Use Room-Temperature Ingredients: This helps the dough come together more smoothly.
- Don’t Skip the Chilling Step: Refrigerate the dough for 30 minutes if you want thicker, chewier cookies.
- Measure Accurately: Baking is a science, so ensure precise measurements for consistent results.
- Experiment with Bake Times: Adjust the baking time based on your preference for soft or crispy cookies.
Nutritional Information
Here’s a rough breakdown of the nutritional content for a single cookie (based on 24 cookies):
| Nutrient | Amount Per Serving |
|---|---|
| Calories | 200 |
| Total Fat | 10g |
| Saturated Fat | 6g |
| Cholesterol | 20mg |
| Sodium | 100mg |
| Total Carbohydrates | 27g |
| Protein | 2g |
Creative Variations to Try
While the original recipe is perfect as is, here are some exciting variations to put your own spin on it:
- Double Chocolate Cookies: Add 1/4 cup of cocoa powder to the dough for an extra chocolatey flavor.
- White Chocolate and Macadamia Nut: Replace semi-sweet chocolate chips with white chocolate chips and add macadamia nuts.
- Oatmeal Chocolate Chip Cookies: Incorporate 1 cup of rolled oats for a chewy, hearty texture.
- Peanut Butter Twist: Swap 1/2 cup of butter for peanut butter for a nutty twist.
FAQ: Your Questions Answered
1. Can I Make the Dough Ahead of Time?
Yes! The dough can be refrigerated for up to 3 days. If you want to store it longer, freeze it in pre-portioned scoops.
2. What’s the Secret to Soft Cookies?
The key is to slightly underbake the cookies. Take them out when the edges are golden but the centers still look slightly soft—they’ll firm up as they cool.
3. Can I Use Salted Butter?
You can, but reduce the amount of added salt to avoid an overly salty flavor.
4. Are These Cookies Freezer-Friendly?
Absolutely! Freeze baked cookies in an airtight container for up to 3 months. Thaw at room temperature or microwave for a few seconds to enjoy warm.
5. How Do I Prevent Flat Cookies?
Ensure your butter isn’t too soft, and chill the dough before baking. This helps the cookies maintain their shape.
Why This Recipe Is a Must-Try
The Nestle Toll House Chocolate Chip Cookie recipe isn’t just a dessert; it’s a timeless tradition. With its perfect balance of flavors and textures, it’s no wonder this recipe has been a go-to for decades. Whether you’re baking for a party, a cozy night in, or just because, these cookies are guaranteed to bring smiles all around.
Conclusion: Your Turn to Create Cookie Magic
Now that you’ve got all the tools, tips, and tricks, it’s time to roll up your sleeves and bake the best batch of cookies you’ve ever tasted. Don’t forget to share your creations with family, friends, or even your social media followers—because cookies this good are meant to be shared!
So, preheat your oven, gather your ingredients, and let the baking adventure begin. Who knows? You might just create a new tradition that everyone looks forward to. Happy baking! 🍪